Last week-end I fortunately finished my end of semester exams. After all the hard work I thought I needed a well-deserved break so I dedicated Saturday 24th to me and Baksu :) We spent a morning out doing some shopping (we also had to pass through the university library...it's impossible to run from uni stuff for a whole day!!). Anyways, everything was fine. We also watched the first episode of the new Lost season...Is Benjamin Linus on the good or on the evil side? Still cannot decide!
But you cannot really have a relaxed day without doing some beloved cooking can you? We decided to bake some chicken pot pies. The idea was taken from www.weightwatchers.com. But my artistic Baksu gave them a personalised touch! Here are the results:
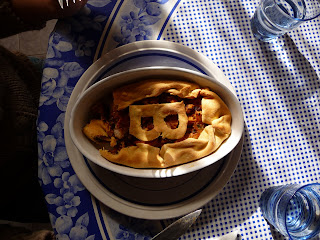
Mine
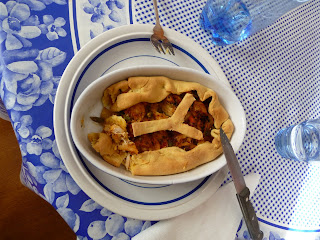
Baksu's
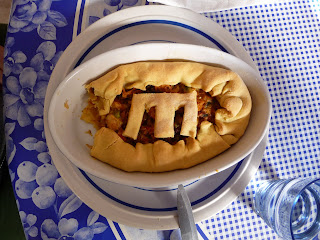
Esthie's
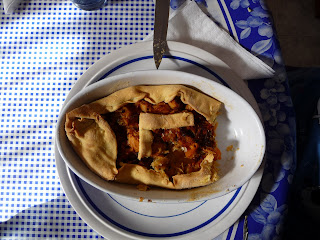
Lari's
We also managed to do some sausage rolls from the dough we had left for which unfortunately we don't have any photos. We ate them later during the night while watching Madagascar II: Retrun 2 Africa :))
Friday, January 30, 2009
Thursday, January 22, 2009
Travel notes
This is all about a project I intend to carry out in the "near" future. When I finish my uni course...hopefully!
Future: Lech (Austria), Lubeck (Germany), Scotland??, Nepal??, Slovakia??
- Sicily : it's all about the laughter
- Lyon: the welcoming city... where it all began
- Clermont Ferrand: very short but very sweet
- Dunkerque: the land of Shtis!
- Belgium: land of the lovely houses
- Lille: the intercultural
- Slovenia: the land of dreams come true
- Wales: the land of breath-taking scenery
- Ireland: the land of emerald green
- Paris: the city of magic
- London: the buzzing city
Future: Lech (Austria), Lubeck (Germany), Scotland??, Nepal??, Slovakia??
Monday, January 19, 2009
The Vintage look in Photoshop
- Select your image. Try to find a standard-quality picture, that's not either very small or very big.
- Open your image in Photoshop. If you have a problem with low picture quality, then consult the "Improving the Image Quality" section below to improve the quality before adding the vintage effect. If the picture is high quality, proceed to the next step.
- Duplicate your image and again go to Blending Options. Choose Overlay or Soft Light, according to your preferences. If your image is a light one, it's better to keep it in low opacity such as 40%.
- Go to Layer>New Adjustment Layer>Selective Color.
- Input these numbers in the following order:
- Reds:+67, -48, -26, +31
- Cyans: +29
- Whites: 0, -45, +18, +8
- Neutrals: +59, -11, -27, +15
- Blacks: +51, +25, +23, -12
- Make a new layer (Ctrl+shift+n).Go to Edit>Fill and fill it with #1200ff or any rich blue color.This will fill your whole image with this colour but don't panic.Your image is not gone!
- Right click your new layer and select again Blending Options. Set it to "Exclusion" and Opacity at 20-25%.
- Add another layer and fill it again in this color: 8581b6. Go to Blending Options and select Color Dodge and set the Opacity to 25-30%.
Subscribe to:
Posts (Atom)